


Astro-logical Serverless Websites: Creating with Astro.js and AWS Lambda
In recent years, the concept of serverless computing has gained immense popularity in the field of web development. Serverless computing is a cloud-based model where the cloud provider manages the infrastructure & automatically allocates resources to execute code on demand, without the need for developers to manage servers. This model enables developers to focus solely on writing code & building applications, rather than managing servers, infrastructure & scaling.
Serverless computing offers a range of benefits for developers, including scalability, cost-efficiency & reduced development time. With serverless computing, developers can easily scale their applications up or down to meet changing demands, without having to worry about managing server capacity. Additionally, serverless computing eliminates the need for developers to pay for idle server time, which can significantly reduce the cost of running applications.
Astro.js is a lightweight framework for building static websites that integrate with serverless functions. It offers developers a simplified syntax for building static websites & makes it easy to integrate with serverless functions like AWS Lambda. With Astro.js & serverless computing, developers can build dynamic, interactive websites with minimal infrastructure overhead.
AWS Lambda is a serverless computing service that allows developers to run code in response to events without the need to manage servers. It supports multiple programming languages, including Node.js, Python & Java, making it easy for developers to write serverless functions.
By combining Astro.js & AWS Lambda, developers can build Astro-logical serverless websites that offer unparalleled scalability, cost efficiency & flexibility. This approach allows developers to build websites quickly & efficiently, without having to worry about managing infrastructure or scaling. In this article, we will know more about creating serverless websites with Astro.js & AWS Lambda.
Creating a Serverless Website with Astro.js & AWS Lambda:
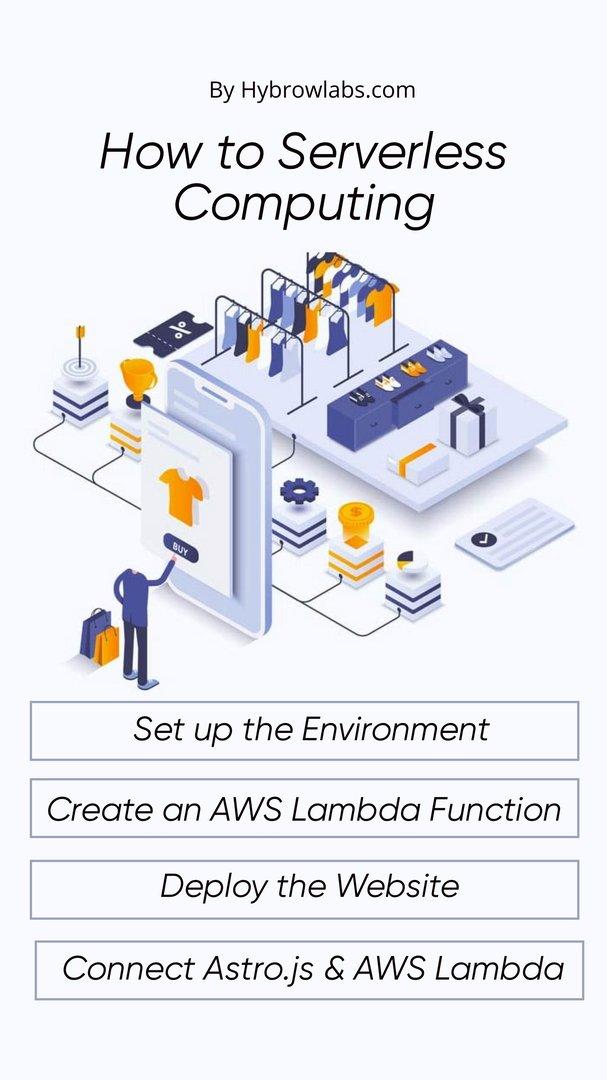
Creating a serverless website with Astro.js & AWS Lambda can be a powerful way to build fast, scalable & cost-effective web applications. In this guide, we'll explore how to get started with these tools & create a basic serverless website.
Step 1: Set up the Environment:
The first step is to set up the environment to use Astro.js & AWS Lambda. This involves creating an AWS account & installing the necessary software. Once you have created an AWS account, you need to install Node.js & npm on your local machine. Then, you can install the Astro.js CLI by running the following command:
npm install -g astro
Step 2: Create a New Astro.js Project:
The next step is to create a new Astro.js project. To do this, run the following command:
astro create my-astro-project
This will create a new Astro.js project with a default template. You can then navigate to the project directory & start the development server by running the following commands:
cd my-astro-project npm run dev
Step 3: Create an AWS Lambda Function:
The next step is to create an AWS Lambda function. To do this, navigate to the AWS Lambda console & click on the "Create function" button. Then, choose the "Author from scratch" option & give your function a name.
Next, choose Node.js as the runtime & create a new execution role with basic Lambda permissions. Finally, click on the "Create function" button to create the Lambda function.
Step 4: Connect Astro.js & AWS Lambda:
The final step is to connect Astro.js & AWS Lambda. To do this, you need to add the AWS Lambda function to your Astro.js project. To do this, open the astro.config.mjs file & add the following code:
import { createLambda }from "@astrojs/renderer";export default{ renderer: createLambda({ name: "my-lambda-function", region: "us-east-1", }), };
This code sets up the connection between Astro.js & AWS Lambda by telling Astro.js to use the Lambda function when rendering pages.
Step 5: Deploy the Website:
To deploy the website, you need to build the Astro.js project & deploy the Lambda function. To build the project, run the following command:
npm run build
This will create a public directory containing the built website. To deploy the Lambda function, navigate to the AWS Lambda console & click on the "Deploy" button.
Once the website & Lambda function is deployed, you can access the website by navigating to the website URL. The website will now be powered by AWS Lambda & Astro.js, providing a fast & scalable solution for your web application needs.
Configuring AWS Lambda & Deploying Your Astro.js Site:
In the previous section, we discussed how to set up an environment for creating serverless websites with Astro.js & AWS Lambda. In this section, we will discuss how to configure AWS Lambda & deploy your Astro.js site.
Step 1: Configuring AWS Lambda:
Once you have created your Lambda function, you will need to configure it to work with your Astro.js site. To do this, you will need to add the necessary environment variables & permissions.
Environment Variables
The first step is to add environment variables to your Lambda function. These variables will tell the Lambda function where to find your Astro.js site & how to access it.
To add environment variables, go to the "Configuration" tab in the AWS Lambda console & click on "Environment variables." Then, click on "Edit" & add the following variables:
- ASTRO_SITE_URL: The URL of your Astro.js site. This should be the URL of the S3 bucket where your site is hosted.
- ASTRO_S3_BUCKET: The name of the S3 bucket where your site is hosted.
- ASTRO_S3_REGION: The AWS region where your S3 bucket is located.
Permissions
The next step is to give your Lambda function permission to access your S3 bucket. To do this, you will need to create an IAM role with the necessary permissions & assign it to your Lambda function.
To create the IAM role, go to the IAM console & click on "Roles." Then, click on "Create role" & choose "Lambda" as the trusted entity. Next, attach the following policies to the role:
- AmazonS3FullAccess
- AWSLambdaBasicExecutionRole
Finally, assign the IAM role to your Lambda function by going to the "Configuration" tab in the AWS Lambda console & clicking on "Permissions." Then, click on "Role" & choose the IAM role you just created.
Step 2: Deploying Your Astro.js Site:
Once you have configured your Lambda function, you can deploy your Astro.js site. To do this, you will need to build your site & upload it to your S3 bucket.
Building Your Site
To build your site, run the following command in your Astro.js project directory:
npm run build
This will generate a public directory containing your built site.
Uploading Your Site to S3
Next, you will need to upload your site to your S3 bucket. To do this, go to the S3 console & create a new bucket. Then, upload the contents of your public directory to the bucket.
Make sure to set the bucket's permissions to allow public access to the objects.
Step 3: Testing Your Site
Once your site is deployed, you can test it by navigating to the URL of your Lambda function. This will trigger the Lambda function to render your Astro.js site & return it to the client.
If everything is configured correctly, your site should load quickly & be fully functional.
Making the Most of Amazon S3 & Amazon CloudFront for Scalability & Performance:
In this section, we will discuss how to make the most of Amazon S3 & Amazon CloudFront for scalability & performance.
Amazon S3 is a highly scalable, reliable & cost-effective object storage service that can be used to host static websites. Amazon CloudFront is a global content delivery network (CDN) that can improve the performance of your website by caching content & serving it from locations closer to your users.
Step 1: Using Amazon S3 for Hosting:
Amazon S3 is a great option for hosting static websites because it is highly scalable, reliable & cost-effective. To use S3 for hosting your Astro.js site, you can simply upload the contents of your public directory to an S3 bucket & configure the bucket as a static website.
To configure your S3 bucket as a static website, go to the S3 console & select your bucket. Then, click on the "Properties" tab & scroll down to the "Static website hosting" section. Click on "Edit" & choose "Use this bucket to host a website." Then, enter the name of your index.html file & click on "Save changes."
Step 2: Using Amazon CloudFront for Caching & Performance:
Amazon CloudFront is a global content delivery network that can improve the performance of your website by caching content & serving it from locations closer to your users. To use CloudFront with your Astro.js site, you can create a distribution that points to your S3 bucket & configure it to cache your site's content.
To create a CloudFront distribution, go to the CloudFront console & click on "Create Distribution." Choose "Web" as the delivery method & click on "Get Started." Then, enter the following settings:
- Origin Domain Name: The domain name of your S3 bucket.
- Origin Path: Leave this blank.
- Viewer Protocol Policy: Choose "Redirect HTTP to HTTPS."
- Allowed HTTP Methods: Choose "GET, HEAD, OPTIONS."
- Cached HTTP Methods: Choose "GET, HEAD, OPTIONS."
- Cache Based on Selected Request Headers: Choose "Whitelist" & add "Host" to the list.
- Object Caching: Choose "Use Origin Cache Headers."
- Minimum TTL: Choose "0."
- Maximum TTL: Choose "31536000."
- Default TTL: Choose "86400."
- Forward Cookies: Choose "None."
- Query String Forwarding & Caching: Choose "Forward all, cache based on all."
- Smooth Streaming: Leave this unchecked.
Once you have entered these settings, click on "Create Distribution." It may take some time for your distribution to be created.
Step 3: Testing Your Site's Performance:
Once your CloudFront distribution is created, you can test your site's performance by navigating to the URL of your distribution. This will trigger CloudFront to cache your site's content & serve it from a location closer to your users.
If everything is configured correctly, your site should load quickly & be fully functional.
Adding a Serverless Backend with AWS API Gateway & AWS Lambda:
In the previous sections, we discussed how to create & deploy a static website using Astro.js & AWS Lambda & how to optimize its performance using Amazon S3 & Amazon CloudFront. In this section, we will discuss how to add a serverless backend to your Astro.js site using AWS API Gateway & AWS Lambda.
Step 1: Creating an AWS Lambda Function:
To create a serverless backend for your Astro.js site, you will need to create an AWS Lambda function that will handle requests from your site. You can use the AWS Lambda console to create a new function from scratch or use a pre-existing template.
Once you have created your Lambda function, you can add your custom code to handle the requests from your site. For example, you could create a Lambda function that retrieves data from a database or performs some other server-side operation.
Step 2: Creating an AWS API Gateway API:
To connect your Lambda function to your Astro.js site, you will need to create an AWS API Gateway API that will act as the interface between your site & your Lambda function. You can use the AWS API Gateway console to create a new API from scratch or use a pre-existing template.
Once you have created your API, you can add a new resource & method to handle the requests from your site. For example, you could create a resource called /API/data & a GET method that invokes your Lambda function to retrieve data from a database.
Step 3: Connecting Your Astro.js Site to Your Backend:
To connect your Astro.js site to your backend, you will need to modify your site's code to make API requests to your AWS API Gateway API. You can use the fetch() function or any other HTTP client library to make API requests.
For example, you could modify your site's code to make a GET request to /API/data & then display the results on your site.
Step 4: Testing Your Serverless Backend:
Once you have connected your Astro.js site to your backend, you can test your serverless backend by navigating to your site & making requests to your API. You can use the AWS Lambda console & the AWS API Gateway console to monitor the requests & responses from your backend.
Conclusion: Blast Off Your Website to the Serverless Stratosphere with Astro.js:

In conclusion, creating a serverless website with Astro.js & AWS Lambda can provide a scalable, cost-effective & performant solution for your web application needs. With the ability to use AWS services like Amazon S3, Amazon CloudFront, AWS Lambda & API Gateway, you can create a robust & reliable serverless architecture that can handle high traffic loads & provide a seamless user experience.
By leveraging the power of Astro.js, you can create a fast & dynamic website with a simple & intuitive syntax. With its built-in components & flexible layout system, Astro.js makes it easy to create modern & responsive websites that work seamlessly across different devices & platforms.
If you are looking to build a serverless website with AWS, Hybrowlabs can help you with our AWS development services. Our team of experienced developers can work with you to design, develop & deploy a serverless website that meets your business needs & exceeds your expectations.
With our expertise in AWS services & Astro.js development, we can help you build a high-performance & scalable serverless website that can take your business to the next level. Contact us today to learn more about our services & how we can help you blast off your website to the serverless stratosphere with Astro.js.
FAQ:
1. What are the benefits of using Astro.js & AWS Lambda for creating a serverless website?
Using Astro.js & AWS Lambda for creating a serverless website provides a number of benefits, including scalability, cost-effectiveness & performance. With AWS services like Amazon S3, Amazon CloudFront & API Gateway, you can create a robust & reliable serverless architecture that can handle high traffic loads & provide a seamless user experience. Astro.js, with its built-in components & flexible layout system, makes it easy to create modern & responsive websites that work seamlessly across different devices & platforms.
2. How do I deploy my Astro.js website on AWS Lambda?
To deploy your Astro.js website on AWS Lambda, you will need to create an AWS Lambda function & use it to serve your static site files. You can use the AWS Lambda console to create a new function, upload your site files to Amazon S3 & then use Amazon CloudFront to distribute your site to users around the world.
3. How do I add a serverless backend to my Astro.js website?
To add a serverless backend to your Astro.js website, you can create an AWS Lambda function & an API Gateway API to handle requests from your site. You can then modify your site's code to make API requests to your backend & display the results on your site.
4. Can I use other AWS services with Astro.js & AWS Lambda?
Yes, you can use other AWS services with Astro.js & AWS Lambda to create a more comprehensive & scalable solution for your web application needs. AWS services like Amazon DynamoDB, Amazon Aurora & Amazon RDS can be used to store & manage your data, while AWS Step Functions can be used to orchestrate complex workflows & business processes.
5. How can Hybrowlabs help me with Astro.js & AWS Lambda development?
Hybrowlabs can help you with Astro.js & AWS Lambda development by providing expertise & experience in building serverless websites with AWS services & Astro.js. Our team of experienced developers can work with you to design, develop & deploy a serverless website that meets your business needs & exceeds your expectations.

Similar readings
a3dc85.jpg)
.jpg)

Apoorva
02-11-2025
Advanced RAG 04: Contextual Compressors & Filters
technology
fd8f11.png)


.jpg)
.jpg)
Industries We Serve
