


Build a Real-Time Chat App with Node.js and WebAssembly


Do you want to develop a real-time chat application? It's simpler than ever to create a quick and effective chat application using Node.js with WebAssembly. We'll walk you through the process of creating a real-time chat app using Node.js and WebAssembly in this article. You'll have a fully functional chat app that you can personalize and use for your own needs at the conclusion of this blog.
What are Node.js and WebAssembly?
With the popular JavaScript runtime environment Node.js, programmers can use the same language for both client-side and server-side development. It is a fantastic option for developing web apps because it is quick, effective, and scalable.
WebAssembly, on the other hand, is a low-level binary format that can be applied to server-side environments and web browsers. It is created for performance-critical applications like handling real-time chat conversations or processing massive amounts of data.
Together, Node.js and WebAssembly give programmers an excellent combination for creating web applications that are quick, effective, and capable of handling complicated tasks.
Why use Node.js and WebAssembly for building real-time chat apps?

For creating real-time chat applications, Node.js and WebAssembly are a great option because of the following factors:
- Even when numerous users are connected at once, Node.js' non-blocking I/O mechanism enables quick and effective processing of chat messages.
- WebAssembly provides a low-level binary format that allows for the execution of performance-critical tasks, such as processing large amounts of data, with high efficiency.
- The combination of Node.js and WebAssembly makes it possible to create chat applications that are quick, effective, and capable of handling complicated jobs.
- Due to the widespread use of Node.js and the sizeable developer community, there are numerous resources available for creating and maintaining chat applications.
- WebAssembly is supported by all major browsers, making it easy to build chat apps that work well across different devices and platforms.
Getting Started with Node.js and WebAssembly

1. Setting up your development environment:
Let's check that you have everything set up properly before we begin. Both Node.js and a coding editor like Visual Studio Code must be set up on your machine.
2. Creating a new Node.js project:
Once you have those set up, you can start a new Node.js project by launching your terminal or command prompt and going to the location where you wish to save it. When prompted, type "npm init" to generate a new package.json file.
3. Installing dependencies:
Installing some dependencies is the next step. For creating the chat app's backend and managing real-time user interactions, we advise using Socket.io and Express.js, respectively. Simply type "npm install express socket.io" into your terminal or command line to install these dependencies.
npm install express socket.io
4. Creating the front end of the chat app:
It's time to build the front end of your chat app now that the backend has been established. Create an easy-to-use interface where users can input their names and begin communicating with one another using HTML, CSS, and JavaScript.
<!DOCTYPE html><html><head><meta charset="UTF-8"><title>Chat App</title><link rel="stylesheet" href="style.css"></head><body><div id="chat-window"><div id="output"></div><input type="text" id="message" placeholder="Type message here"><button id="send">Send</button></div><script src="app.js"></script></body></html>
5. Adding WebAssembly to the project:
But why stop there? By including WebAssembly in the project, you can advance your chat programme. When handling complicated data processing or other computationally intensive tasks, this can be extremely helpful. You must use a program like Emscripten to compile your code into a.wasm file in order to add WebAssembly to your project. Once you have your.wasm file, you can use the WebAssembly API to load it into your JavaScript code.
With all these tools in place, you're ready to start building your chat app!
Are you ready to build your own Chat App? Learn how to do it step-by-step!
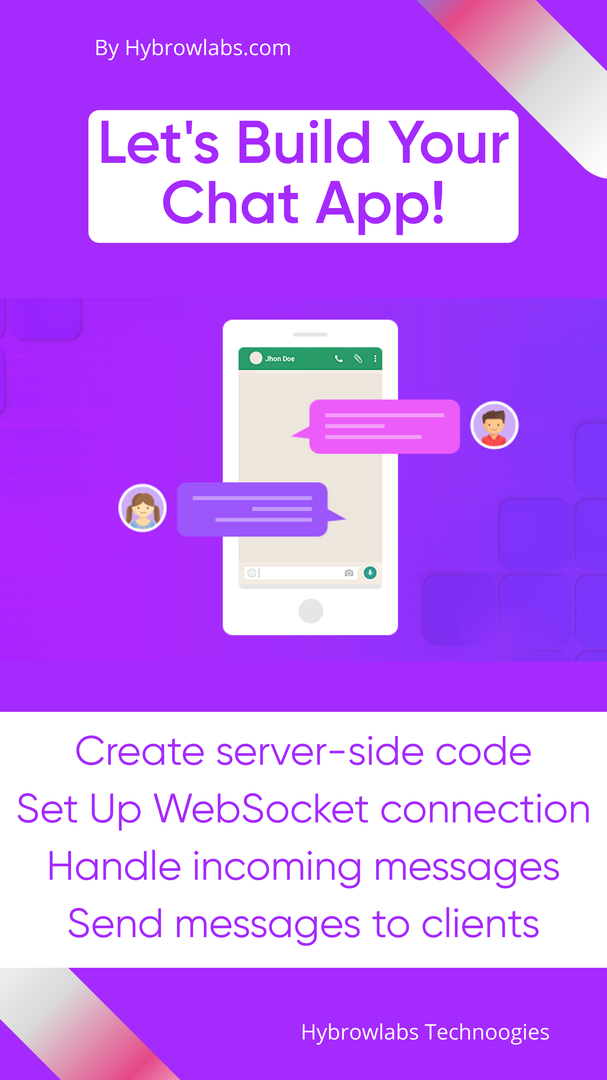
1. Creating the server-side code:
To create the server-side code, you can use a variety of languages and frameworks, such as Node.js and Express.
For example: Let's say you're building a chat app that allows users to join and create chat rooms. You can use Node.js and Express to create an HTTP server that handles incoming requests from clients. Once the server is set up, you can create a database to store user information, chat room data, and message history. You can also use frameworks such as Socket.IO to enable real-time communication between clients and the server.
2. Establishing a WebSocket connection:
To establish a WebSocket connection, you can use Socket.IO or other WebSocket libraries such as WebSocket API.
For example, when a client connects to the server, the server sends a handshake response to the client to establish a WebSocket connection. Once the connection is established, clients can send and receive messages in real-time without the need to refresh the page.
3. Handling incoming messages:
To handle incoming messages, you can use event listeners to listen for incoming messages from clients.
For example, when a user sends a message, the client sends the message to the server, and the server broadcasts the message to all connected clients. You can also use Socket.IO to emit events and handle events on the server and client-side.
4. Sending messages to all clients:
To send messages to all clients, you can use the broadcast function in Socket.IO.
For example, when a client sends a message to the server, the server can use the broadcast function to send the message to all connected clients in the same chat room. This ensures that all clients receive the message in real-time, regardless of their location.
5. Managing users:
Managing users in a chat app involves creating a system that allows users to join chat rooms, interact with other users, and keep track of their activity.
For example, users can create and join chat rooms, edit their profiles, and view their message history. The system also includes authentication to ensure secure communication and features such as user blocking and reporting to maintain a positive user experience. By effectively managing users, the chat app can provide a safe and enjoyable environment for everyone involved.
Overall, building a chat app requires a combination of server-side code, WebSocket connections, message handling, broadcasting, and user management. By carefully considering each of these components, you can create a chat app that is both functional and enjoyable to use. So, get started today and build your very own chat app!
Discover the top features to add and keep your users engaged!

1. Adding authentication:
Let's say you built a chat app for a group of friends who want to stay connected. You can add authentication by allowing each user to create an account using their email address and a password. When a user logs in, the app will check their credentials against the database and grant them access to the app's features. With authentication, users can join chat rooms, create private chats, and enjoy a secure communication experience.
2. Adding private messaging:
Now let's say your friends want to communicate one-on-one without disrupting the group chat. You can add private messaging by creating a separate chat room for each user or by implementing a direct messaging feature. In the first approach, each user would have their own private chat room where they can communicate with other users. In the second approach, users can select a user from their contact list and send them a direct message that is separate from the group chat. Either way, private messaging can help users connect on a more personal level
3. Adding emojis and images:
Finally, let's say your friends want to express their emotions and share photos or images with each other. You can add emojis and images by integrating a third-party library such as Twemoji or Emojione or by allowing users to upload and share images directly within the app. With emojis, users can convey emotions such as joy, sadness, or excitement with just a few taps. With images, users can share photos of their latest adventure or a funny meme they found on the internet. Adding emojis and images can help make your chat app more visually appealing and engaging.
Is your app launch-ready? Master the art of testing and deployment now!
Testing and deployment are crucial steps in building a chat app. Here's how you can effectively test and deploy your app:
1. Testing the chat app:
Before deploying the app, it's important to test it thoroughly to ensure it's working as expected. You can use automated testing tools such as Jest or Mocha to test the app's functionality and ensure that it's free from bugs and errors. You can also perform manual testing by inviting users to test the app and provide feedback.
For example, you can test the app's messaging feature by sending messages between multiple users and verifying that they are received correctly. You can also test the app's authentication feature by verifying that only authorized users are able to access the app.
2. Deploying the chat app to a server:
Once you're satisfied with the app's performance, you can deploy it to a server to make it available to users. There are several hosting providers such as Amazon Web Services, Google Cloud, and Microsoft Azure that offer server hosting services.
To deploy your app, you can use a deployment tool such as Docker or Heroku. These tools allow you to easily package your app and deploy it to a server with just a few commands. You can also configure the server to automatically update the app whenever new changes are made.
For example, if you're using Heroku, you can deploy your app by pushing it to a Git repository and configuring Heroku to build and run the app. Heroku will automatically manage the server and scale it as needed based on user demand.
Benefits of using Node.js and Web Assembly for building chat apps:

Here are some advantages of creating chat applications with Node.js and WebAssem
bly.
- For the development of server-side real-time chat applications, Node.js offers a robust and scalable framework.
- The client-side code can now be executed quickly and effectively using WebAssembly, which enhances the speed of the app as a whole.
- The cross-platform compatibility of both technologies makes it simple to create and implement chat applications across a variety of platforms and devices.
- Developers can use a variety of third-party frameworks and tools with Node.js and WebAssembly, allowing for the quick development and iteration of chat applications.
- These technologies can be combined to create chat applications that are quick, dependable, and responsive and provide users with a wonderful user experience.
Conclusion:
In conclusion, we went over the essential processes in developing a chat application, such as creating the server-side code, implementing features like authentication and private messaging, testing the application, and deploying it. Additionally, we talked about the advantages of using WebAssembly and Node.js to build chat applications, which give programmers a strong and effective framework on which to design chat apps that operate quickly and effectively. Developers can create chat applications that provide a wonderful user experience and improve interaction and collaboration amongst users using these tools and methods. For those interested in utilizing these technologies, consider exploring Hybrowlabs Node.js Development Services and Hybrowlabs WebAssembly Development Services for expert assistance in building robust chat applications.
FAQ
1. Why would I want to create a real-time chat app using WebAssembly and Node.js?
When compared to JavaScript, WebAssembly can offer a significant performance boost, especially for computationally demanding activities like encryption and decryption. You can use pre-existing C/C++ libraries and other low-level code in your application by combining WebAssembly with Node.js.
2. What are some well-liked Node.js modules and frameworks for creating real-time chat applications?
Socket.io, Primus, and SockJS are a few well-liked libraries and frameworks for creating real-time chat applications in Node.js.
3. How can I put my WebAssembly and Node.js chat app into production?
There are numerous ways to get a Node.js and WebAssembly chat software into production, including using a platform-as-a-service (PaaS) provider like Heroku or Firebase, deploying to a dedicated server, or using a cloud service provider like AWS or Google Cloud.
4. What are some typical problems encountered when developing a real-time chat application using WebAssembly and Node.js?
Managing server-side state, dealing with message delivery and synchronization, and ensuring application security are a few typical problems. With an increase in users and communications, it's also critical to take performance into account.


Similar readings
a3dc85.jpg)
.jpg)

Apoorva
02-12-2025
Advanced RAG 04: Contextual Compressors & Filters
technology
fd8f11.png)


.jpg)
.jpg)
Industries We Serve
