


How to Streamline Project Management in ERPNext
.png)
Project management is a fundamental discipline that drives the successful execution of tasks, initiatives & ventures within a defined timeframe & budget. In the dynamic & competitive business landscape, efficient project management is essential for organizations to deliver projects on time, meet and clients' expectations & achieve strategic goals. ERPNext, a comprehensive & versatile enterprise resource, planning software, offers a robust project management module that empowers businesses to effectively plan, execute & track projects from inception to completion. Today in this article, we will explore the fundamentals of project management in ERPNext, how to create projects in ERPnext, how to create tasks in ERPnext & how to track the whole process in ERPNext.
More Read: How to Create Custom Docktypes in ERPnext?
What is project management in ERPnext?
In ERPNext, project management is a comprehensive module that allows businesses to plan, execute & track projects effectively. It provides tools & features to manage various aspects of a project, including tasks, resources, timelines, budgets & collaboration. The project management module in ERPNext is designed to streamline project workflows, enhance team productivity & ensure successful project delivery.
Benefits of Project Management in ERPNext:
1. Module Integration:
ERPNext integrates different modules like Sales, Purchase, Inventory, Accounting, Project Management & more. This integration ensures that data entered in one module automatically reflects in related modules, reducing manual data entry & ensuring consistency.
2. Centralized Database:
ERPNext maintains a centralized database that stores all information related to the business processes. This single source of truth ensures data accuracy & provides a holistic view of the organization's operations.
3. User-Friendly Interface:
ERPNext offers an intuitive & user-friendly interface that is easy to navigate. The layout & design are organized logically, making it simple for users to find & access the required features & information.
4. Custom Workflows:
ERPNext allows businesses to create custom workflows tailored to their specific processes. Custom workflows guide users through the steps, ensuring that the process is followed correctly & consistently.
5. Linked Documents:
Within each module, ERPNext links related documents, such as invoices linked to sales orders or purchase orders linked to purchase receipts. This linkage allows users to trace the flow of transactions and understand their dependencies.
6. Real-Time Updates:
ERPNext provides real-time updates, allowing users to view changes made by others instantly. This real-time collaboration enhances teamwork & fosters a cohesive work environment.
7. Visualizations and Reports:
ERPNext offers various visualizations, such as the Gantt Chart & Kanban Board, which provide graphical representations of data, making it easier to understand & analyze information.
Now let’s explore how to manage projects in ERPNext!
How To Create A Project In ERPNext?
You work as a project manager in a digital agency & your team has an offer to create an e-commerce website for a customer. The customer is a fashion shop aiming to enhance sales & develop their online presence by creating an appealing and user-friendly online store. To effectively manage & track the progress of this project, you decide to create a dedicated project in ERPNext.
Step 1: Log in to ERPNext
A. Open your web browser & enter the URL to access your ERPNext instance.
B. Enter your username & password to log in.
Step 2: Set Up Project Types
A. In ERPNext, project types define different categories of projects based on your business needs. Examples of project types could be "Internal Projects," "Client Projects," "Research Projects," etc.
B. Follow these procedures to create project types:
C. Select "Project Types" from the list of modules by clicking on the "Desk" symbol in the top-left corner. Select the appropriate project type from the dropdown menu. Project types classify projects according to their nature or purpose. For example, if you have various project kinds such as "Internal Projects," "Client Projects," and "Research Projects," you can establish related project types for better organization and filtering.
D. Click "New" to start a new project type.
E. In the "Name" column, give it a unique name for the project type.
F. Optionally, describe the "Description" field.
G. Save the project type by clicking "Save."
Step 3: Create a New Project
A. Now that you have set up project types, it's time to create a new project.
B. To create a new project, follow these steps:
- Click on the "Desk" icon again & select "Projects" from the list of modules.
- Click on "New" to create a new project.
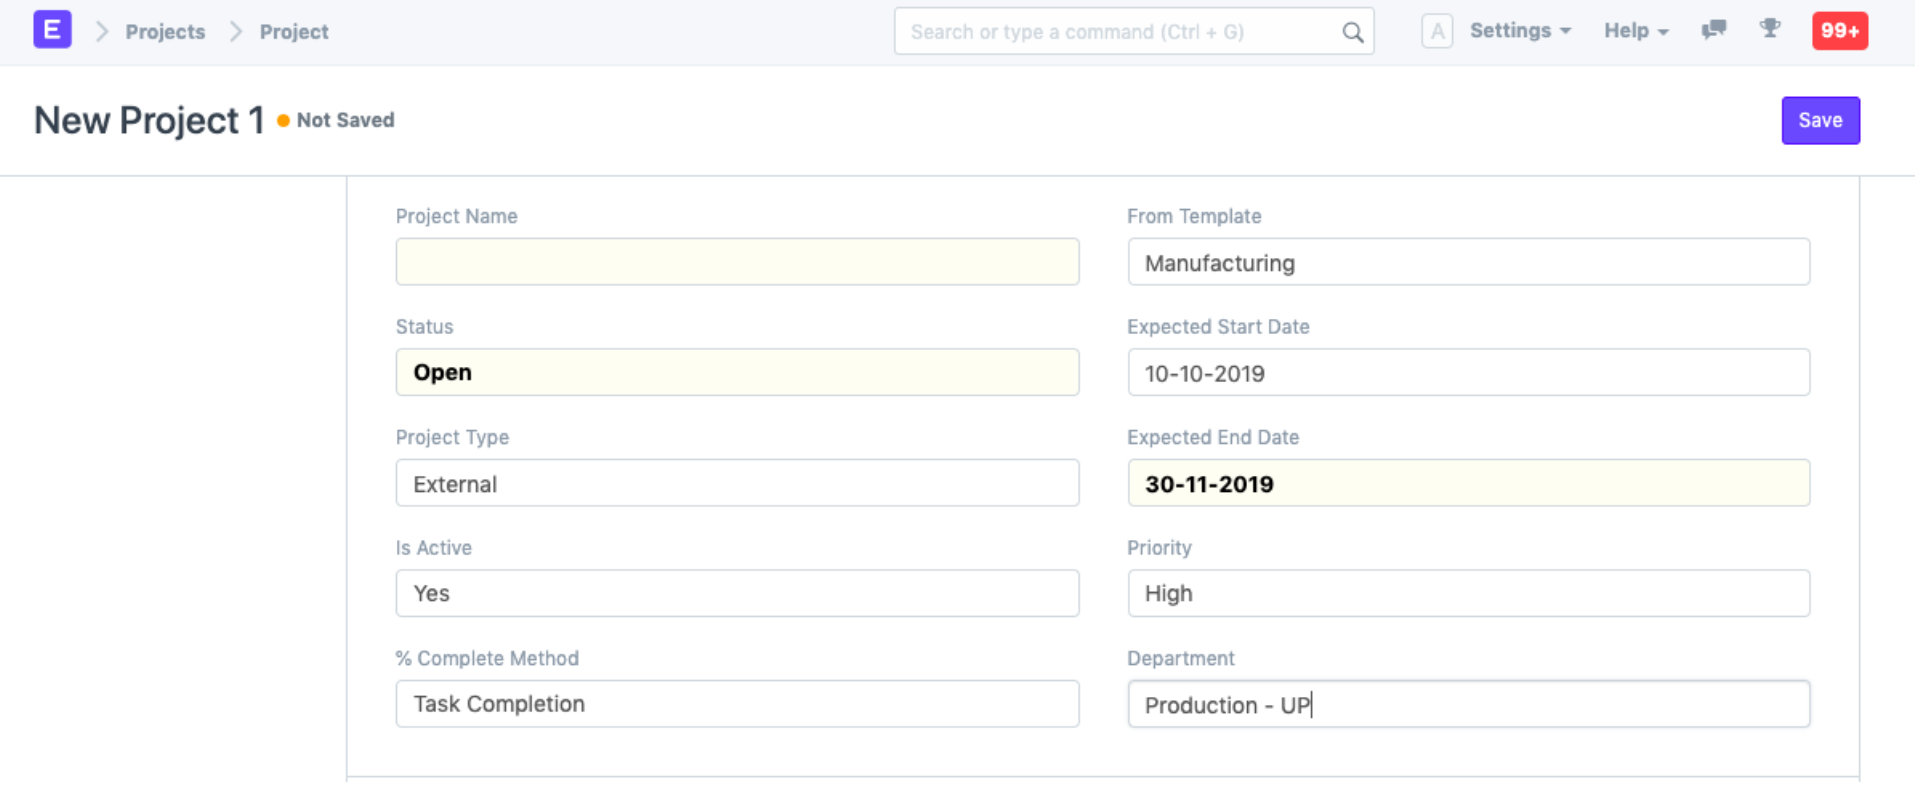
- Fill in the project details:
- Project Name: Enter a descriptive name for the project.
- Project Type: Choose the appropriate project type from the drop-down list you created earlier.
- The "Status" dropdown represents the current stage of the project. Select the relevant status that describes the project's progress. The most common status options are "Open," "In Progress," "On Hold," and "Closed." Select the status that best represents the project's current situation.
- Start Date: Determine the project's start date.
- End Date: Set the end date for the project.
- Company: If your ERPNext instance handles multiple companies or subsidiaries, use the "Company" dropdown to specify the company for which you are creating the project. This makes sure that the project is associated with the correct entity.
- Priority: Prioritize projects based on their importance or urgency. The "Priority" dropdown typically includes options like "Low," "Medium," & "High." Assign the appropriate priority level to indicate the project's relative importance compared to other projects.
- Project Manager: If you have specific project managers responsible for overseeing different projects, from the dropdown select the appropriate project manager. This helps assign ownership & accountability for the successful execution of the project.
- Other details like %complete method, department, etc. can be filled as per your requirements.
- Click "Save" to create the project.
You can custom other additional details
a. Customers:
- If the project involves a specific customer or client, you can link them to the project. This association helps in managing customer-related details, communications & feedback specific to that project.
- To link a customer to a project, follow these steps:
- In the project dashboard, find the "Customers" section.
- Click on "Add Customer" & select the appropriate customer from the list or create a new customer profile if it doesn't exist.
- Customization: You can customize customer fields in ERPNext to capture additional information relevant to your business. This includes adding custom fields like "Contact Information," "Contract Details," or any other specific data you want to store for each customer.
b. Costing and Billing Section:
- ERPNext allows you to manage project-related costs, expenses & billing information. This includes recording costs incurred during the project & generating invoices for customers based on the project's progress.
- To add costing & billing details to a project, follow these steps:
- In the project dashboard, navigate to the "Costing and Billing" section.
- Enter relevant information like project budget, estimated costs & billing details.
- You can also link expenses and purchase orders to the project to keep track of project-related financial transactions.
- Customization: You can customize billing terms & templates in ERPNext to make sure that the generated invoices align with your company's branding & financial policies.
c. Monitor Progress:
- Monitoring the progress of a project involves keeping track of tasks, milestones, deadlines & overall project completion. ERPNext provides various tools & reports to help you monitor project progress effectively.
- Follow these steps, to monitor project progress:
- Use the project dashboard to get an overview of the project's status, tasks & timeline.
- Utilize Gantt charts to visualize task dependencies & timelines.
- Generate project-related reports to analyze progress, costs & other key metrics.
- Customization: You can customize project dashboard views & reports in ERPNext to display the specific information & metrics you need for effective project monitoring. This allows you to focus on the most critical aspects of the project based on your business requirements.
Imagine your software development company frequently undertakes similar types of projects like building websites or developing mobile applications for clients. While the specific requirements & technologies may vary, the general process & tasks involved remain consistent across these projects. where you have repetitive or standardized projects that follow a similar structure or set of tasks, you need to create a project template.
How To Create A Project Template In ERPnext?
Step 1: Set Up Project Types (if not already done)
Before creating project templates, make sure that you have set up project types. If not, follow the steps mentioned earlier to create project types.
Step 2: Create a New Project Template
A. To create a new project template, follow these steps:
B. Click on the "Desk" icon in the top-left corner & from the list of modules select "Project Template".
C. Click on "New" to create a new project template.
Step 3: Define Project Template Details
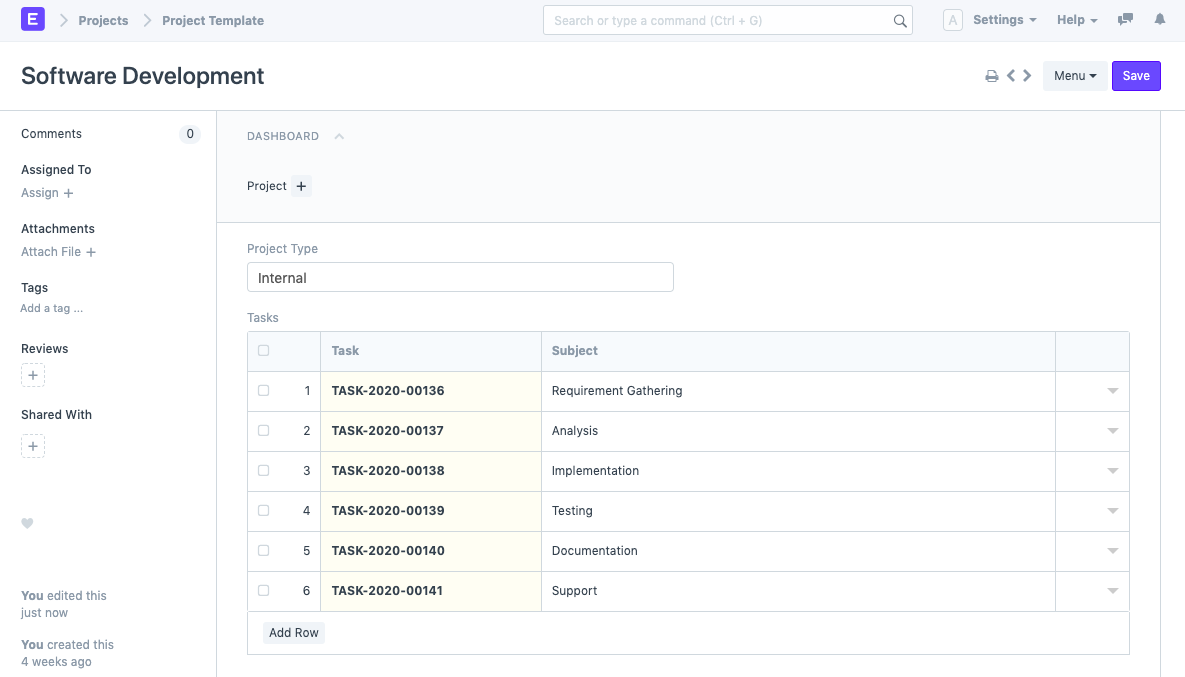
Fill in the details for the project template:
- Template Name: Enter a unique & descriptive name for the project template.
- Project Type: Choose the appropriate project type from the drop-down list you created earlier.
- Description: Optionally, describe the project template.
- Tasks: Here, you can define the tasks that are common to projects based on this template. Click on "Add Multiple" to add multiple tasks.
- For each task, enter a task name, description & other relevant details like start date, end date, assigned to, etc.
- Save the project template by clicking "Save."
Step 4: Using the Project Template
You can use the project template as a blueprint for creating new projects once you've developed it.
- Follow these steps to create a new project using the template:
- Select "Projects" from the list of modules by clicking on the "Desk" icon.
- To start a new project, click the "New" button.
- In the top-right corner of the new project form, there is a "Use Template" button.
- Click "Use Template," and a pop-up box appears with a list of available project templates.
- Select the desired template from the list & ERPNext will populate the project form with the predefined tasks & details from the template.
- Review and update any specific project details if necessary.
- Save the new project.
Step 5: Modifying Project Templates (Optional)
If you need to update or modify existing project templates, follow these steps:
- Go to the "Project Template" list & find the template you want to modify.
- Click on the template name to open it.
- Make necessary changes to the template details or tasks.
- Save the updated template.
Now your software development company frequently undertakes projects like building websites or developing mobile applications. Creating new tasks within the projects helps manage the workflow, assign responsibilities, track progress & assure the successful delivery of high-quality software products to clients.
How to Create Tasks Within a Project in ERPNext?
Step 1: Go to the Project
A. Click on the "Desk" icon in the top-left corner & select "Projects" from the list of modules.
B. Find & open the project you want to create a new task. If you haven't created the project yet, follow the steps mentioned earlier to create a new project.
Step 2: Add a New Task
Once you are in the project dashboard, follow these steps to create a new task:
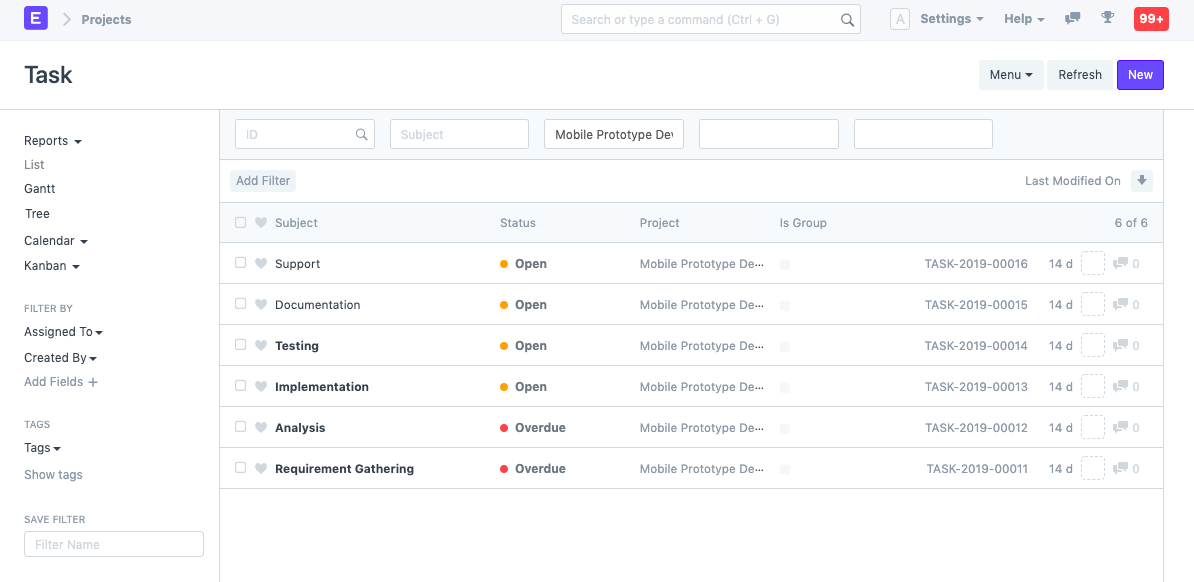
- Scroll down to the "Tasks" section or tab. In this location, all the tasks related to the project are listed.
- Click on the "Add Task" button to create a new task.
Step 3: Fill in Task Details
In the task creation form, provide the required details for the task:
- Task Name: Enter a defining name for the task.
- Description: You can add more details about the task to provide additional context.
- Start Date: Set the start date for the task (when it should begin).
- End Date: Set the end date for the task (when it should be completed).
- Assign to: Select the team member or employee in charge of performing the task from the dropdown list.
- Status: Set the task's initial status (e.g., Open, In Progress, Pending, Completed).
- Task Weight: You can assign a weight to a task here to define its importance or priority in relation to other tasks.
- Click the "Save" button to save the job.
- Save the task by clicking the "Save" button.
Step 4: Update Task Progress (Optional)
After creating the task, you can update its progress as ‘completed’. You can do this by following these steps:
- Go back to the project dashboard & open the task you created.
- In the task details view, update the task status & completion percentage if applicable.
- Save your changes.
Let’s say you are the project manager of a software development company responsible for delivering a web application for a client. The project follows the company's standard software development process, which involves various phases and tasks. You can track the progress of projects & tasks using various visualization menus like the Gantt Chart, Kanban Board & Calendar. Each of these menus provides a different perspective on your projects & tasks, making it easier to monitor progress & manage work effectively.
How to Track Projects or Tasks Status in ERPnext?
Step 1: Go to Projects or Tasks
Click on the "Desk" icon in the top-left corner and select "Projects" or "Tasks" from the list of modules to track project or task progress.
Step 2: Gantt Chart Visualization
A. The Gantt Chart provides a timeline view of your projects and tasks. It shows the start & end dates of tasks & their dependencies.
B. To access the Gantt Chart for a project or task, follow these steps:
- Open the project or task you want to visualize.
- Click on the "Gantt" tab to switch to the Gantt Chart view.
- Use the Gantt Chart to view task durations, dependencies & overall project progress.
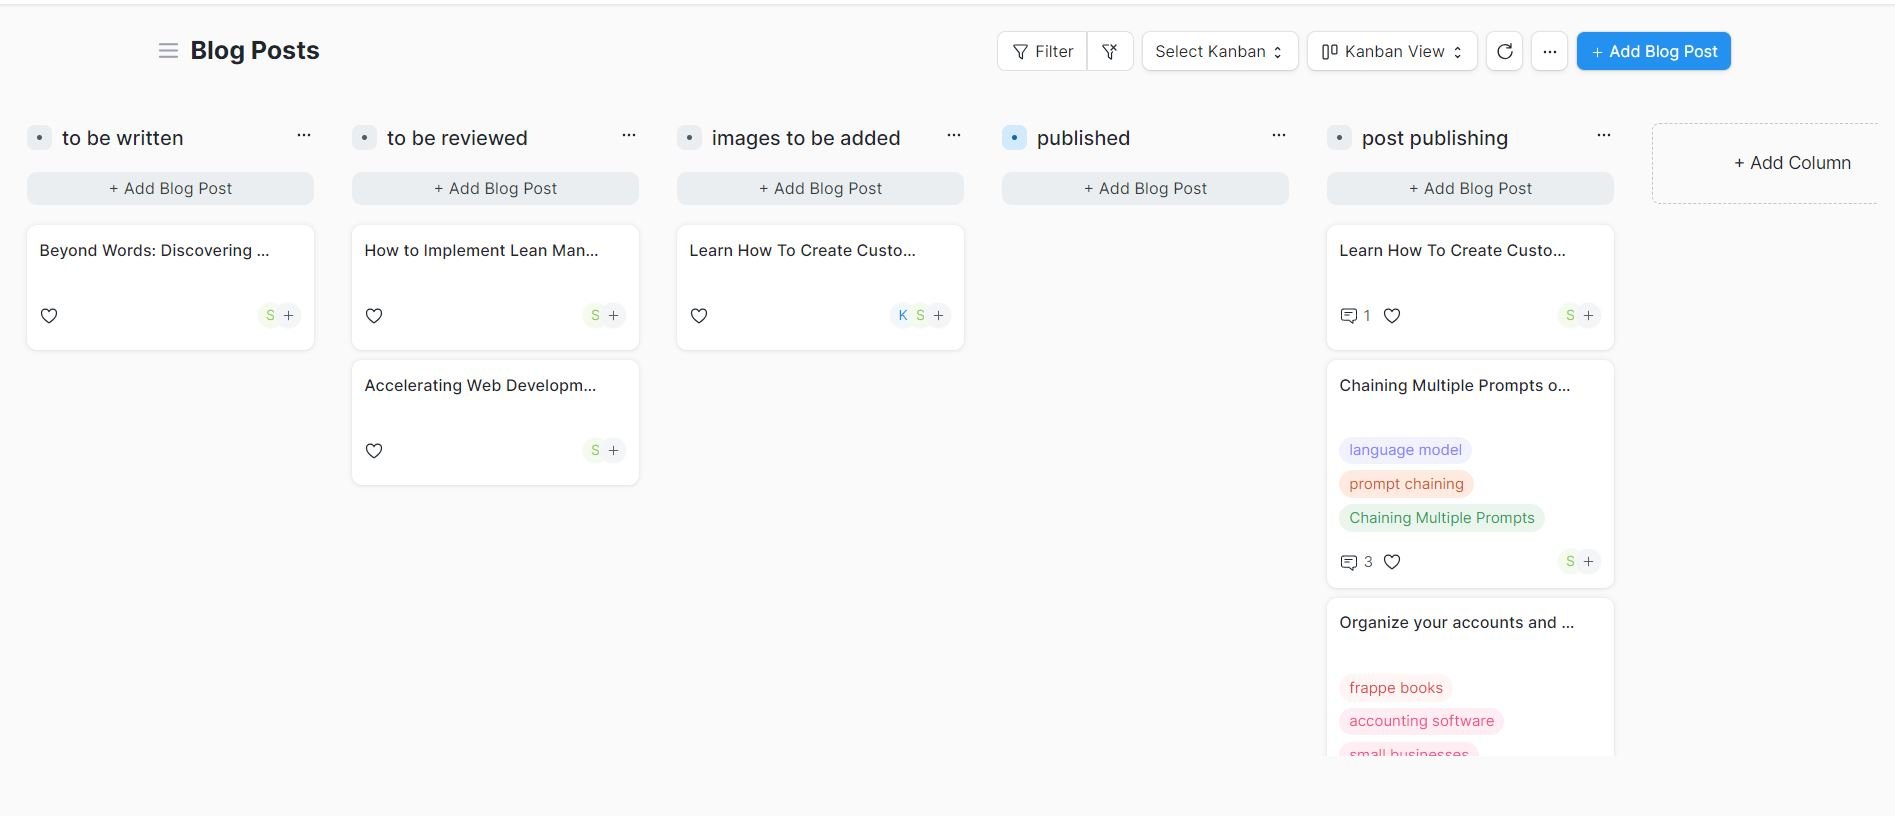
Step 3: Kanban Board Visualization
A. The Kanban Board offers a visual board with columns representing different stages of your tasks or projects.
B. To access the Kanban Board, follow these steps:
- Go to the project or task list.
- Click the "Kanban" button in the top-right corner to switch to the Kanban Board view.
- You can now transfer jobs between columns as they advance through different phases (e.g., To Do, In advance, Done) on the Kanban Board.
Step 4: Calendar Visualization
A. The Calendar provides a view of your projects & tasks scheduled over time.
B. To access the Calendar, follow these steps:
- Go to the project or task list.
- To switch to the Calendar view, click on the "Calendar" button in the top-right corner.
- Use the Calendar to see task start and end dates, plan deadlines & manage project schedules.
Step 5: Update Task Progress
As team members work on tasks, they can update task progress & status regularly. This information is reflected in the visualizations to provide real-time insights.
Step 6: Analyze and Make Decisions
A. Use the different visualization menus to analyze project & task progress.
B. Identify any delays, bottlenecks, or resource constraints & take appropriate actions to keep the project on track.
C. Make data-driven decisions based on the visualizations to optimize project management & improve productivity.
Conclusion:
In conclusion, ERPNext's project management module is a powerful & comprehensive tool that empowers businesses to excel in project execution. With its user-friendly interface & a wide range of features, ERPNext simplifies the planning, execution & tracking of projects, ensuring they are completed efficiently & successfully.
If you are looking for customizing your ERP system according to your unique business requirements to improve efficiency & gain a competitive advantage in the market, partner with Hybrowlabs. With proven expertise and industry experience, Hybrowlabs provides specialized ERPNext development services for customized project management solutions, offering an end-to-end approach from consulting to dedicated support. With Hybrowlabs as your trusted partner, you can streamline project workflows, optimize resource utilization & achieve project success with confidence. Visit Hybrowlabs' service page for more info.
FAQ:
1. What is ERPNext's Project Management Module?
ERPNext's Project Management Module is a feature that allows businesses to plan, execute & track projects efficiently within the ERPNext system. It includes tools for task management, resource allocation, progress tracking & collaboration.
2. Can I integrate ERPNext's Project Management with other software applications we use?
Yes, ERPNext supports integration with other software applications, allowing seamless data flow & synchronization. Integration can be achieved through APIs & connectors.
3. How does ERPNext support collaboration among project team members?
ERPNext provides communication features such as task comments, file sharing & notification alerts, enabling team members to collaborate, share updates, and discuss project-related matters within the system.
4. Is ERPNext's Project Management Module suitable for all industries?
Yes, ERPNext's Project Management Module is versatile & can be adapted to various industries. Customization options allow businesses to tailor the module to specific industry requirements.
5. Does ERPNext offer reporting & analytics for project performance analysis?
Yes, ERPNext provides reporting & analytics tools that offer insights into project performance, resource utilization, task progress & other project-related metrics.


Similar readings
a3dc85.jpg)
.jpg)

Apoorva
02-12-2025
Advanced RAG 04: Contextual Compressors & Filters
technology
fd8f11.png)

.jpg)
.jpg)
Industries We Serve
